체크 record 선정
SELECT * FROM "sejong_bike"
WHERE bike_id LIKE 'SJ-0001'
     AND user_id='junecy'
ORDER BY __time
LIMIT 1
#1 .csv 파일을 직접 vi로 수정하여 druid에 반영이 되었는지 확인
$ vi data_fn.csv

# 1번 record station_rental_id = 0101로 변경
반영 안되는 것 확인

#2. druid에 record ingestion 후 druid에 반영이 되었는지 확인
Updating existing data
This spec creates a datasource called updates-tutorial from the quickstart/tutorial/updates-data.json input file.
{
  "type" : "index_parallel",
  "spec" : {
    "dataSchema" : {
      "dataSource" : "updates-tutorial",
      "timestampSpec": {
        "column": "timestamp",
        "format": "iso"
      },
      "dimensionsSpec" : {
        "dimensions" : [
          "animal"
        ]
      },
      "metricsSpec" : [
        { "type" : "count", "name" : "count" },
        { "type" : "longSum", "name" : "number", "fieldName" : "number" }
      ],
      "granularitySpec" : {
        "type" : "uniform",
        "segmentGranularity" : "week",
        "queryGranularity" : "minute",
        "intervals" : ["2018-01-01/2018-01-03"],
        "rollup" : true
      }
    },
    "ioConfig" : {
      "type" : "index_parallel",
      "inputSource" : {
        "type" : "local",
        "baseDir" : "quickstart/tutorial",
        "filter" : "updates-data2.json"
      },
      "inputFormat" : {
        "type" : "json"
      },
      "appendToExisting" : false
    },
    "tuningConfig" : {
      "type" : "index_parallel",
      "maxRowsPerSegment" : 5000000,
      "maxRowsInMemory" : 25000
    }
  }
}
bin/post-index-task --file quickstart/tutorial/updates-init-index.json --url http://localhost:8081
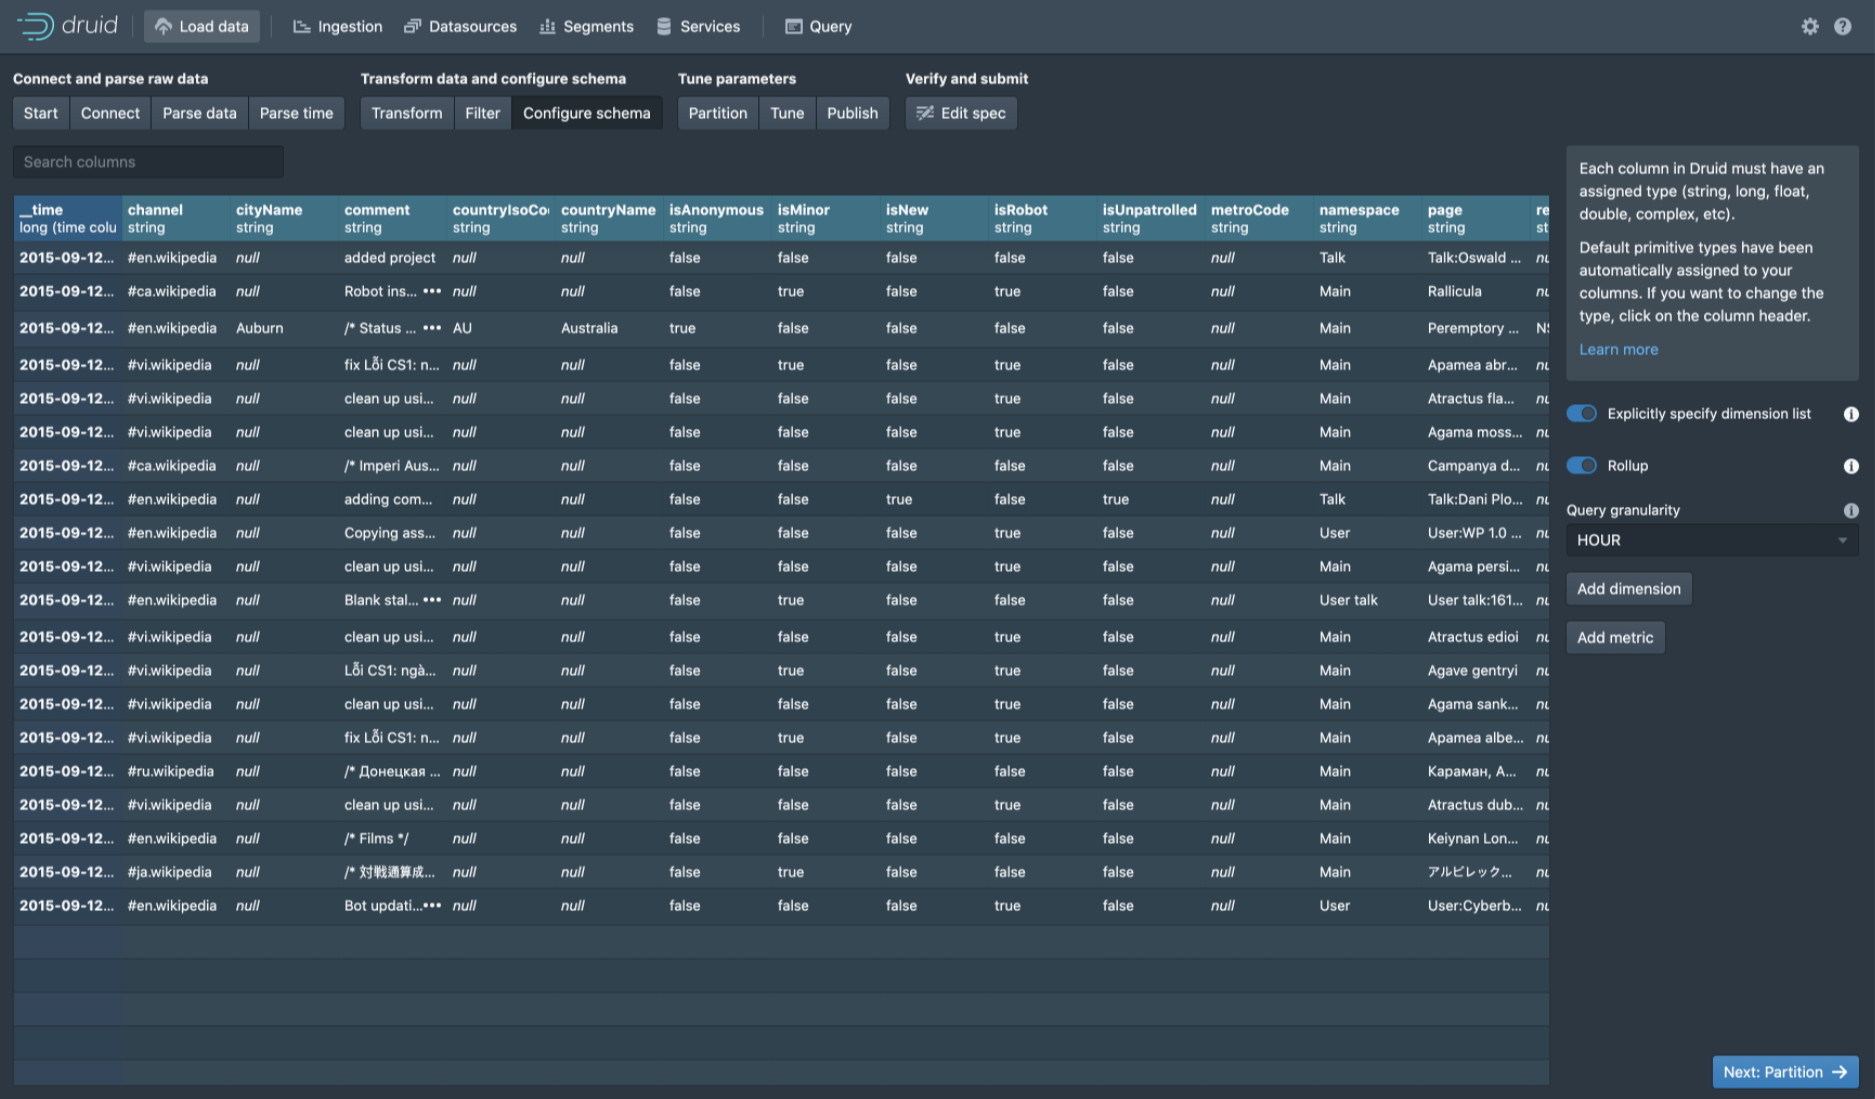
druid console에서 확인

'Database > Druid' 카테고리의 다른 글
| Druid Quickstart (0) | 2020.08.21 |
|---|---|
| How to install Druid 0.19.0 on Cent OS 8 (0) | 2020.08.21 |
| CentOS 8 에서 Druid Console 외부접속하기 (0) | 2020.08.05 |
| How to install Druid 0.13.0 on CentOS 8 (0) | 2020.07.31 |
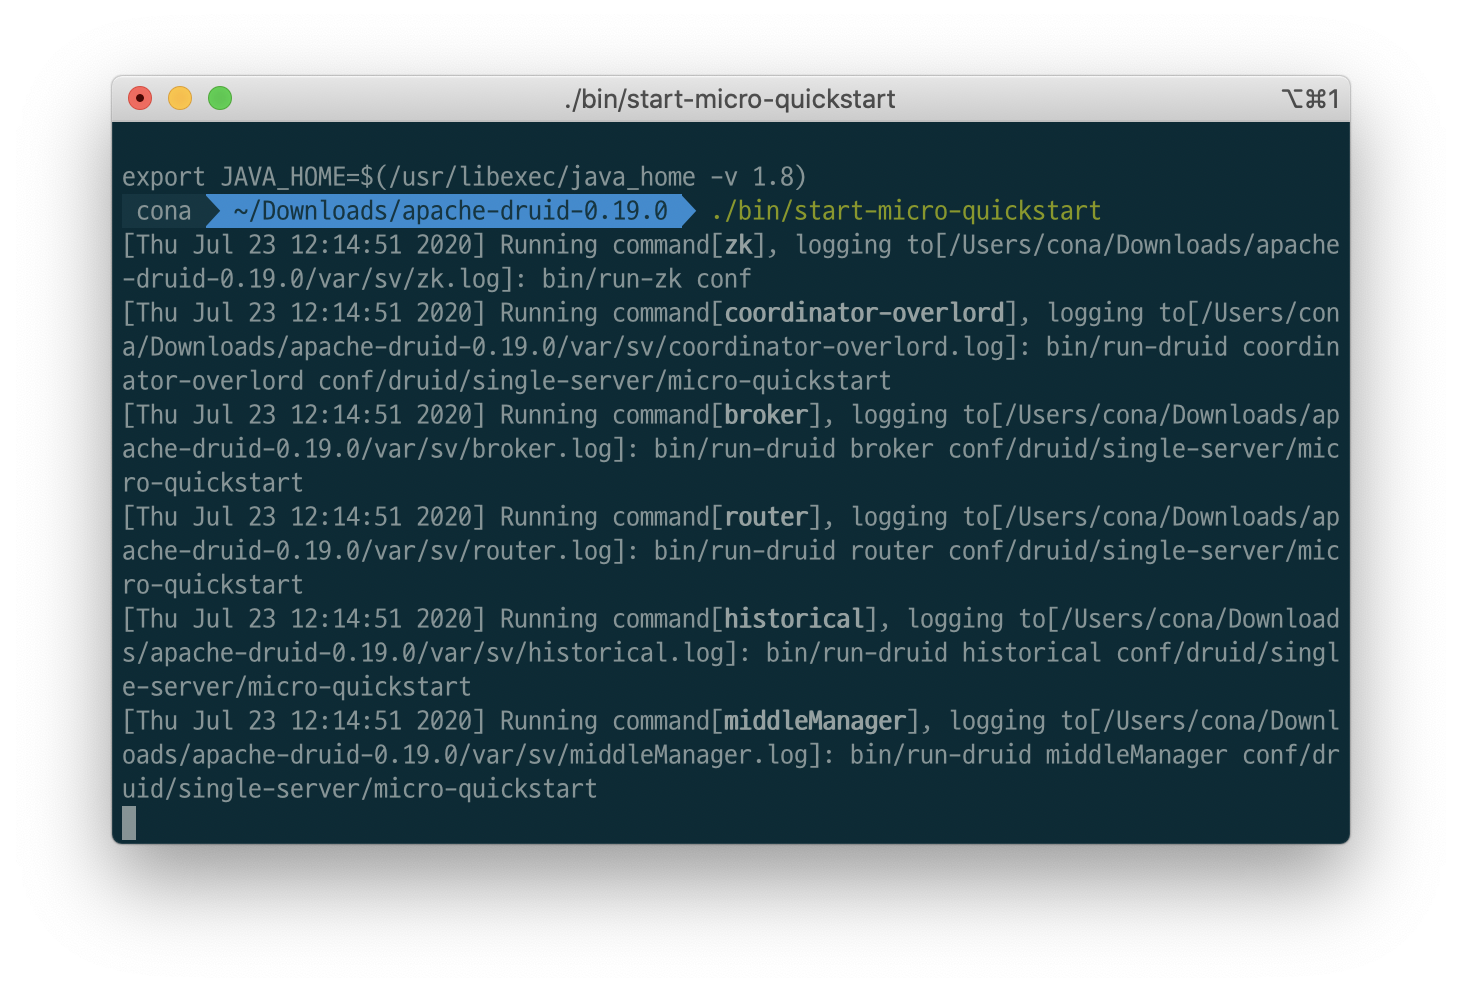
| [MacOS] Druid 설치 (0) | 2020.07.23 |